This section of the documentation is currently under construction. Check back later for updated content.
Manage Company
How to configure basic information about your company
Begin by clicking on your company's button at the lower right of your screen.

Here you can enter your Company Name, Primary Contact, and Start date. For a company with many locations, enter your global company name here.

Locations

Select Locations from the left side menu and add any relevant locations for your business by clicking the black Add Location button at the top right. This category will be important when you enter administrators, who can either schedule and verify trainings at the company level or the location level. For this reason, it may be useful to you to define locations by buildings, if some administrators will only be tracking trainings within certain buildings.
Even if you only have one location, enter that location here.

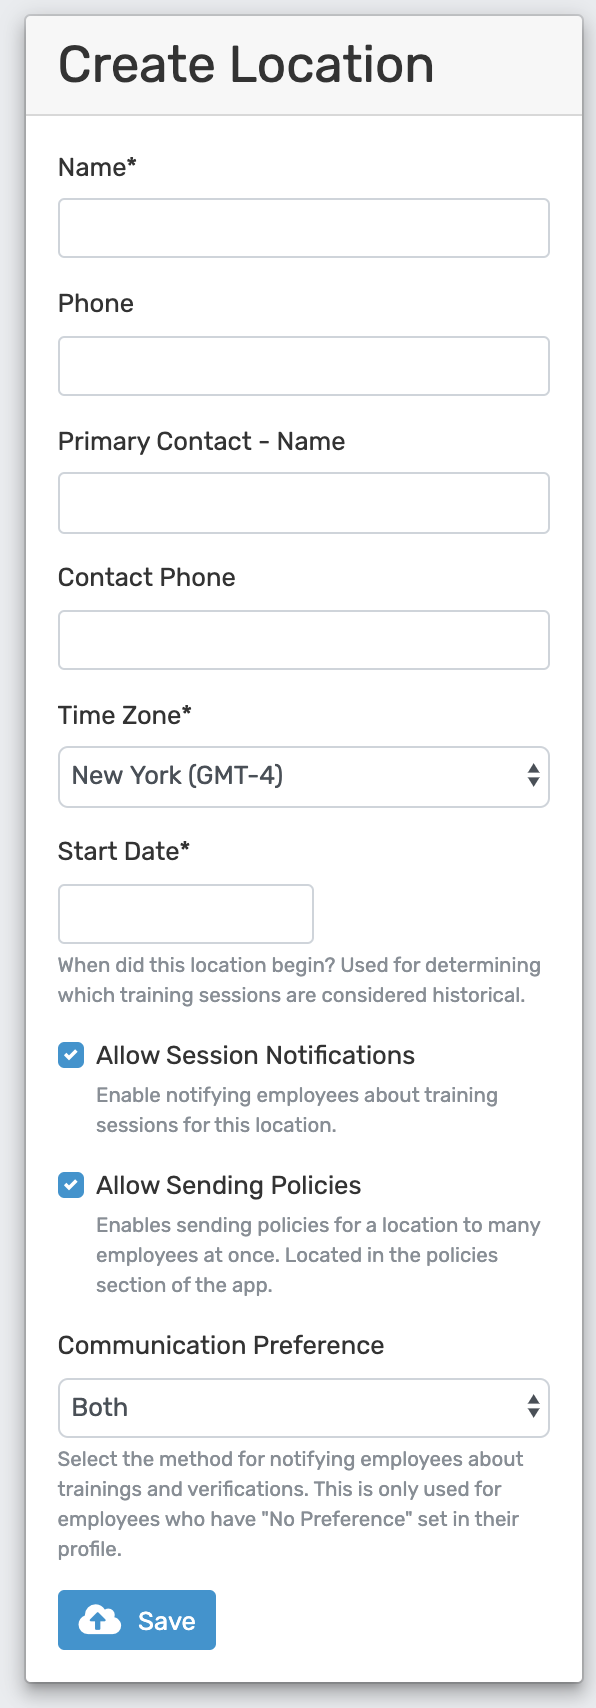
Here you will fill out the name of this location, its phone number, the name of a contact for this location, that individual's phone number, the location's time zone and start date.
Check the Allow Session Notifications and Allow Sending Policies boxes in order enable messaging from Branchworks to your employees. The session box allows you to schedule training sessions, and receive signatures to verify trainings through Branchworks. The Policies box allows you to send out and receive signatures to verify policies. If you prefer to handle these processes outside of Branchworks, you can leave these unchecked.
Next, you can set Communication Preference. Later when you enter employees into the system, you can set preferences for individuals that override this default. For example, you may know that texting is most convenient for the majority of your employees, but certain individuals prefer to receive communication through email, and this can be entered into their records.
Departments

Next you can define your departments by selecting Departments on the left side menu and clicking on the black Add Department button. Departments will be helpful when filtering reports.
Users
Finally, select Users from the Left side menu. When you go to Add User with the black button, you can invite administrators.
Please note that most employees you train and track won’t need accounts. “Users” with accounts are administrators who help manage training and policy documents, schedule or report training sessions, view or edit training logs, and run reports on your employee training history. Different users have different permissions.
Admins can view, edit, and add information in all parts of the system.
Trainers can schedule or report training sessions, update training topics, policies, and roles, and have view-only access to other features. (Click here for more on Trainers)

When you add a new user, enter their email address.
You have the choice to make them a company-wide administrator, or the administrator for one location only. For Location Admins, you will have to add one or more locations.
The person you invite will receive an email with a link, which will arrive in their inbox. Please note, the link will expire after one week!

Once they click on the link, they will have to set a password to proceed into the system.

Edit Users
To edit users, click the pencil button next to their name.

This will take you to a screen where you can change their admin level/role, and locations.


.svg)